Repairing a PC CRT Like it’s 2005
Let’s Fix a Sony Trinitron PC CRT with messed up white balance
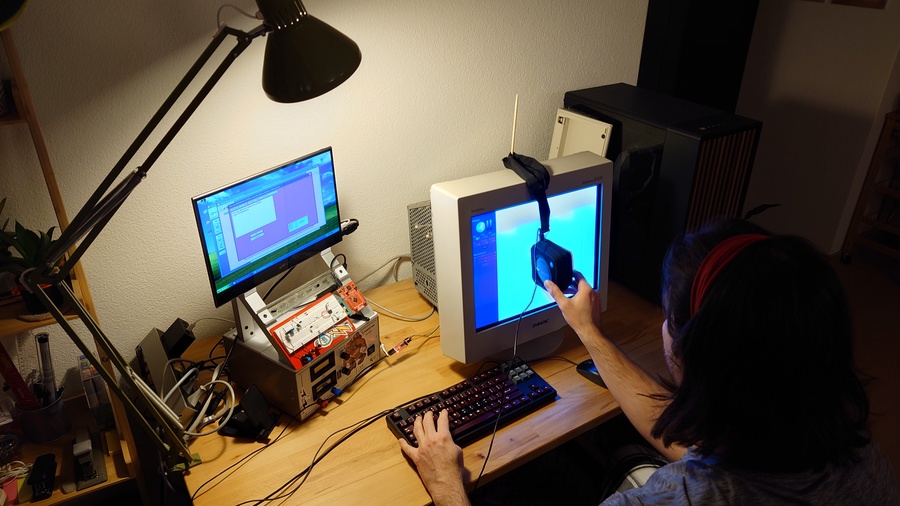
I happen to have this cool Sony Trinitron that I’d like to use for playing retro games. The problem, however, is that the colors are washed out and everything looks whiter than it should. If you’re old enough to remember the cathode ray tube (CRT) era, you’ll know this is usually a white balance calibration issue.
There’s some information online about performing this calibration using a piece of software called WinDAS for TTL control of the monitor, along with another tool called HCFR for color calibration. Both applications run best on Windows XP.
Setting up a Windows XP virtual machine on a modern Arch Linux host is the part where I found the least amount of useful information. In this post, we’ll go through that process step by step.
Table of Contents
Overview
Here is the overview of the steps discussed on this post:
Installing QEMU -> Finding WinXP Image -> Setting up the VM -> Gathering Apps -> Running the VM -> Installing Drivers
Setting up a Windows XP VM On Arch Linux
Installing QEMU
In a modern Arch Linux workflow, when you need to deal with proprietary Windows or macOS nonsense, you’d typically use Quickemu and move on with your life. Unfortunately, Quickemu doesn’t support legacy operating systems like Windows XP.
The solution is to go one step lower on the abstraction ladder and use QEMU directly. If you don’t already have it installed, run:
sudo pacman -S qemu-desktop
Finding a Windows XP Image
Next, we need a Windows XP image. Fortunately, the Internet Archive has us covered. You can download an ISO from:
https://archive.org/details/WinXPProSP3x86.
The serial listed in the description worked for me:
Serial: MRX3F-47B9T-2487J-KWKMF-RPWBY
Setting Up the VM
- Create a working directory:
mkdir winxp-vm
cd winxp-vm/
- Create a virtual disk
qemu-img create -f qcow2 winxp.img 5G
- Run the VM and install windows, jusk like doing it on real hardware
qemu-system-x86_64 \
    -hda winxp.img \
    -boot d  \
    -cpu qemu32 \
    -enable-kvm \
    -cpu host \
    -m 2048 \
    -vga cirrus \
    -net none \
    -device usb-tablet \
    -cdrom en_windows_xp_professional_with_service_pack_3_x86_cd_vl_x14-73974.iso
The important flag here is <-boot d>, which tells the VM to boot from the CD-ROM—just like booting from an installation disc on a physical machine.
Also, using <-cpu qemu32> is convenient because it makes the VM image more portable. You can back it up and run it on other machines without needing to reconfigure everything.
Gathering the Required Applications
Once Windows is installed, we need to bring the required software into the VM. The easiest way to do this is by creating an ISO image and mounting it as a virtual CD-ROM.
In general you’ll need Windas to talk to the monitor and HCFR to receive color information from probes. Specific to my setup, I needed also drivers for my spectometer (colormunki photo) and for the USB-to-TTL adapter. For the latter I used a cheap FTDI clone from Aliexpress. If you have an arduino, it is possible to use the USB to UART chip on the board for this, you just need to short the reset pin to ground.
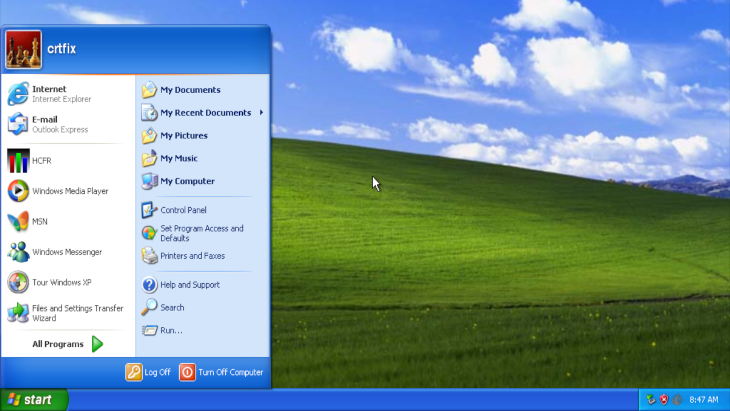
Create a folder called crtfix and place all required files inside it. Then generate an ISO using:
mkisofs -o crtfixapps.iso crtfix/
In my case, the crtfix folder looked like this:
├── crtfix
    ├── CDM20824_Setup.exe
    ├── DASX.zip
    ├── HCFRSetup.exe
    └── zadig_xp-2.2.exe
You might see on internet forums people recommending early versions of HCFR. Don’t listen, the last released version is what you want.
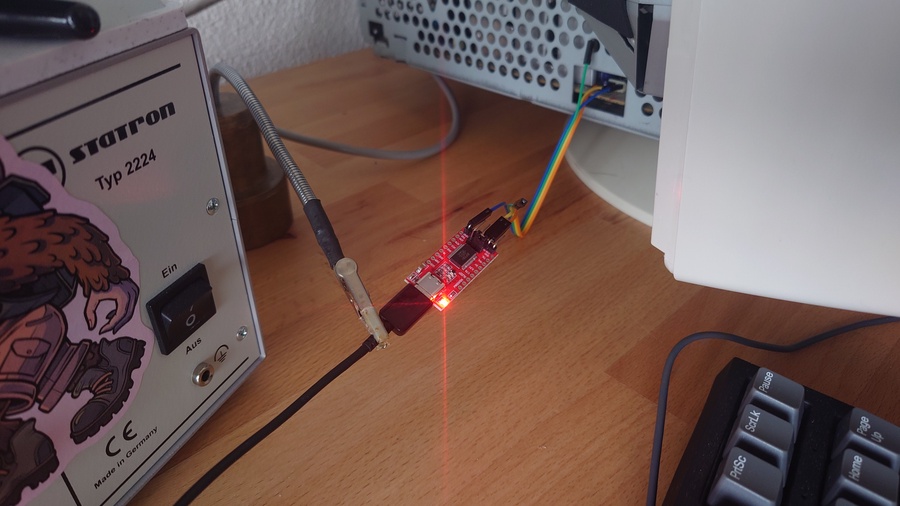
Other thing to note in this picture is where to connect the USB-to-TTL adapter on (most) Sony monitors. Once you remove the plastic back cover, it is possible to have access to a slot on the left of the monitor where the communication pins are exposed. I never bother to connect the +5V pins and everything works just fine.
Also remember, in UART you connect RX->TX / TX->RX. It makes sense if you think one side sends and the other side receives.
Sources
I got HCFR from SourceForge:
https://sourceforge.net/projects/hcfr/files/Windows/3.5.1.4/
WinDAS from:
https://archive.org/download/sony-das-original/DASX.zip
Zadig from:
https://zadig.akeo.ie/downloads/
And finally, the FDTI driver from:
https://ftdichip.com/drivers/d2xx-drivers/
Run the VM
Before start the VM, we need to forward the USB devices to the VM so it can see the physical devices connected to the USB port on the physical computer.
First, connect your USB devices and list them:
lsusb
This will show the connected devices along with their vendor and product IDs. For me the important lines were:
Bus 001 Device 008: ID 0403:6001 Future Technology Devices International, Ltd FT232 Serial (UART) IC
Bus 001 Device 009: ID 0971:2007 Gretag-Macbeth AG ColorMunki Photo
Now with this info we can finally start the virtual machine and get the job done
sudo qemu-system-x86_64 \
        -hda winxp.img \
        -boot c  \
        -cpu qemu32 \
        -enable-kvm \
        -cpu host \
        -m 2048 \
        -vga cirrus \
        -net none \
        -device usb-tablet \
        -usb -device usb-host,vendorid=0x0403,productid=0x6001 \
        -usb -device usb-host,vendorid=0x0971,productid=0x2007 \
        -cdrom crtfixapps.iso
Some Final Notes
After this, locate the files on the CD-ROM drive (usually D:) and install everything in the traditional windows fashion with these installers that you press next next next ….
The most time consuming part of this project, for me, was getting the ColorMunki Photo to work. Turns out the solution quite simple once you know it: Don’t install the drivers from the manufacturer. Instead, install the Zadig application. In the “Driver” tab, select libusb-win32 and BOOM, everything works.
There is a nice video on youtube describing how to proceed with the color calibration process by citylion 1. It’s a fairly lengthy procedure, so set aside at least an hour.
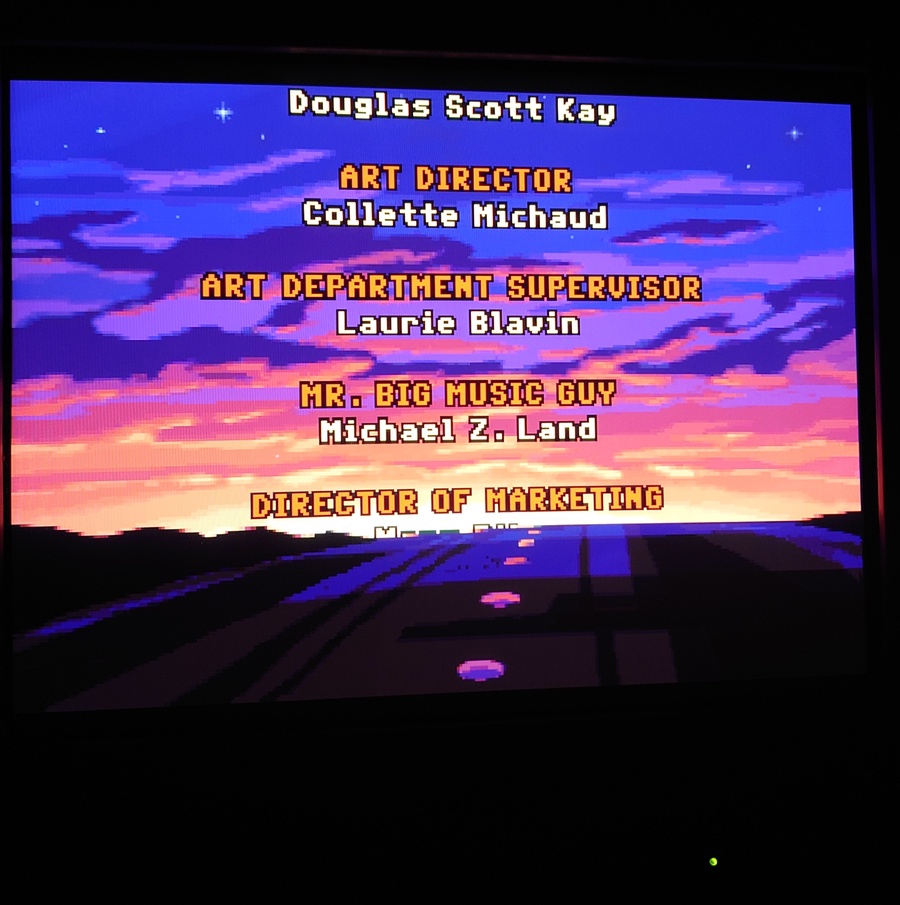
The results are incredible. I’m very pleased with the display now. It actually looks better than both modern LCD displays that I own. It does not look better than my expensive OLED display, however.
Bye for now,
Eddie